Troubleshoot common issues with triggers in your recipe
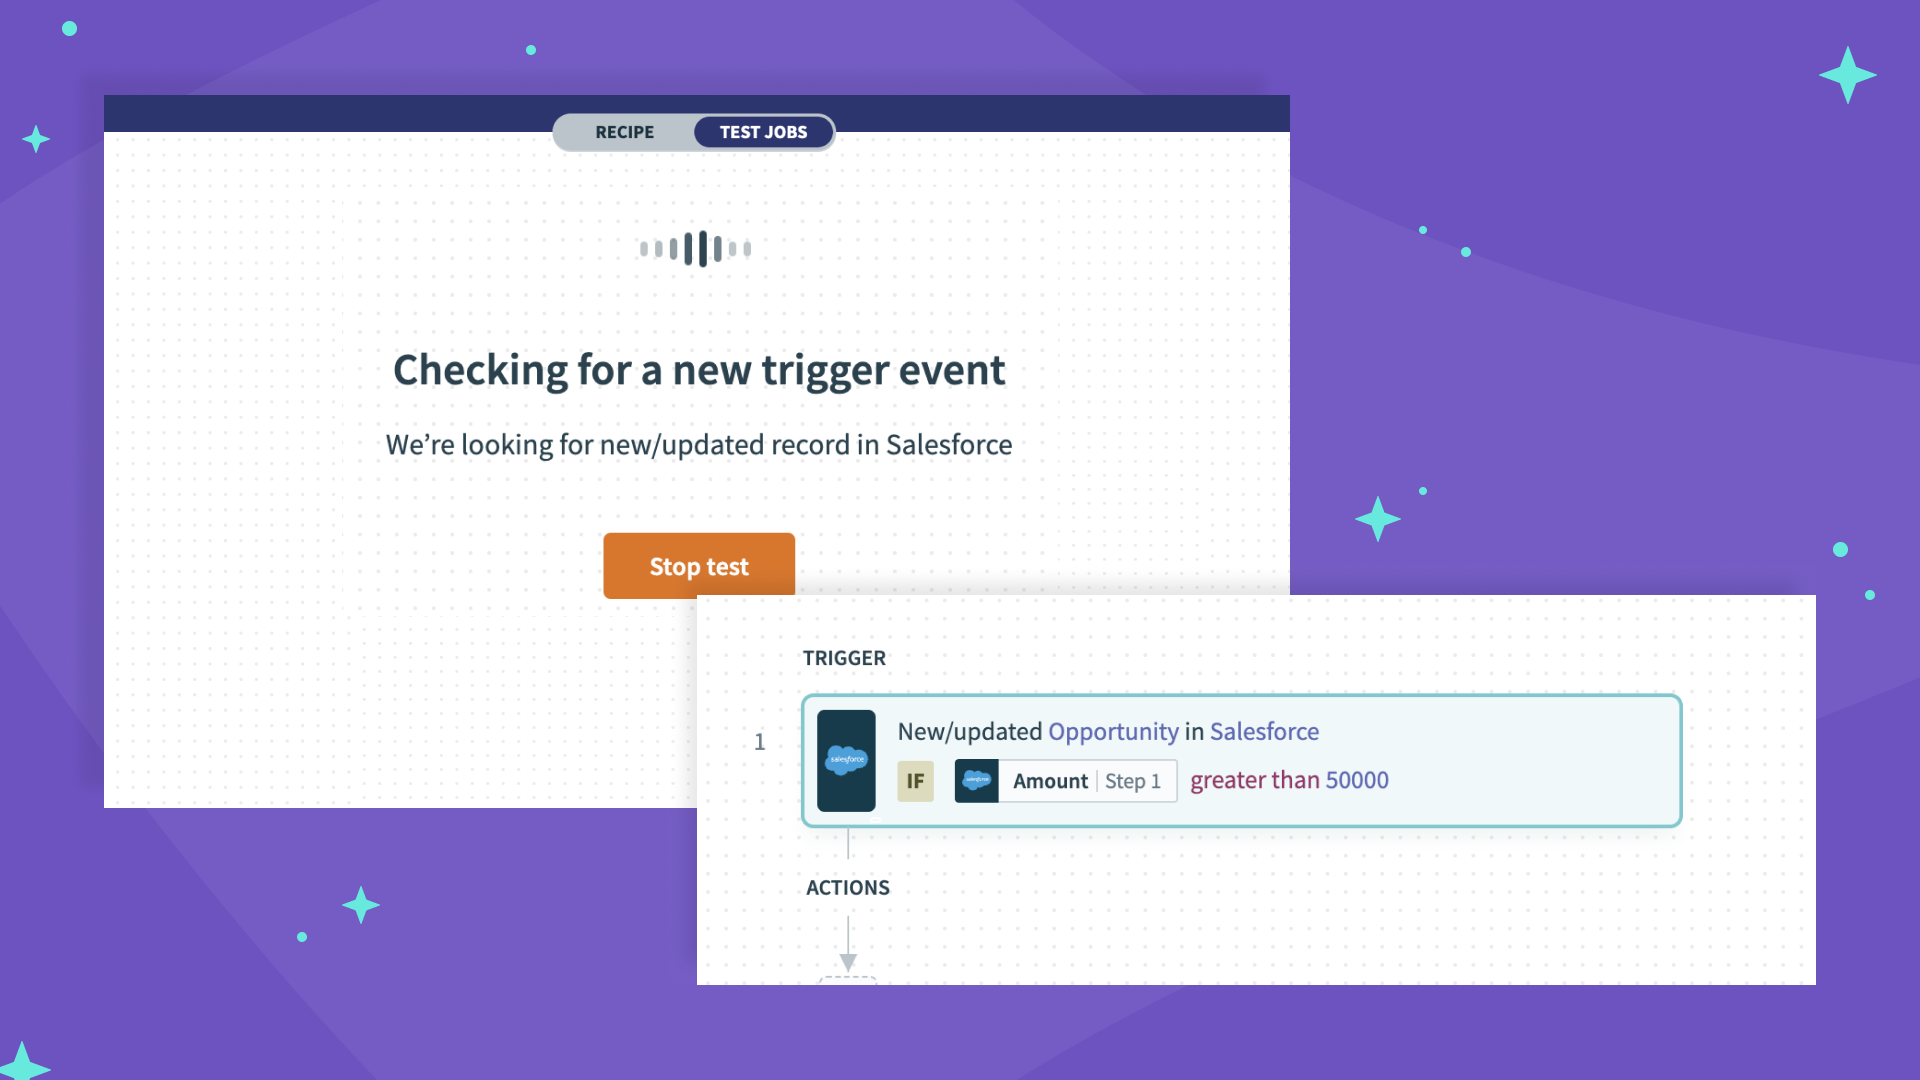
Triggers are one of the most important components of any automation process. In this article, we‘ll provide a comprehensive guide to troubleshooting common errors in triggers when your trigger is not pulling any data to kick off your recipe
Related: Best practices for recipe design
Before that, let’s go back to basics.
What is a Trigger?
In Workato, a trigger is an event that is used to initiate a set of predefined actions automatically. Examples of triggers can include:
- a new Salesforce case
- an updated Jira issue
- a scheduled trigger
- a webhook trigger
Adding conditions to triggers
With the help of trigger conditions, you can further define guidelines to control when your recipe should be triggered. There conditions can be set up with a variety of criteria such as:
- only picking up updated Jira issues with
Highpriority - only picking up events in the year
2022
Related: How to use dates in conditions
Common issues with triggers
Below, you will find 4 reasons why your triggers might not be pulling any data to kick off your recipe.
- You are not connected to the right app connection
- There is no data in your source app
- Your trigger condition may be too precise or too loose
- The start time of your recipe is not defined properly
The video below provides a step-by-step hands on tutorial on how to troubleshoot each situation properly. If video is not for you, read on.
#1 Connect to the right app connection
If the trigger isn’t pulling any data, the first thing to check is if you are using the right app connection.
Related: How to create a new app connection
To do so, with your trigger step selected, click the Connections tab at the top of the right hand panel.
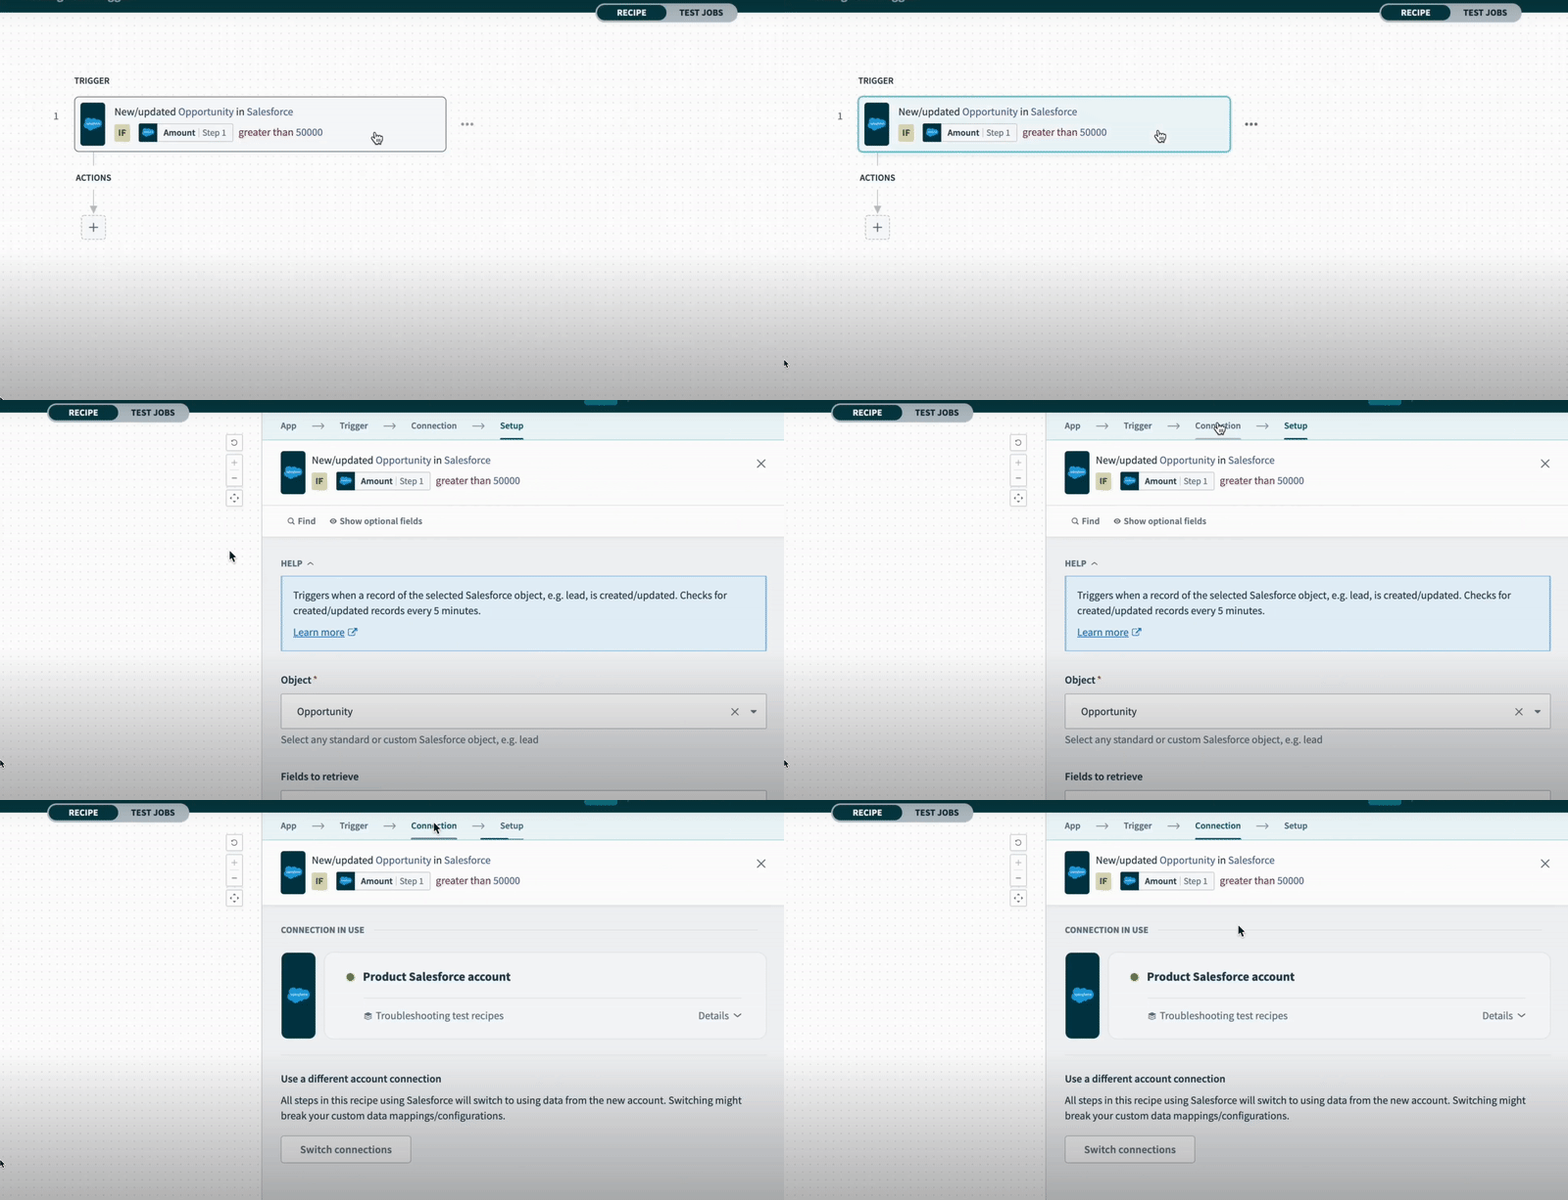
Check that you are connected to the right app connection
If you are not connected to the right app connection, click on the Switch connections button below and choose the right app connection for your recipe.
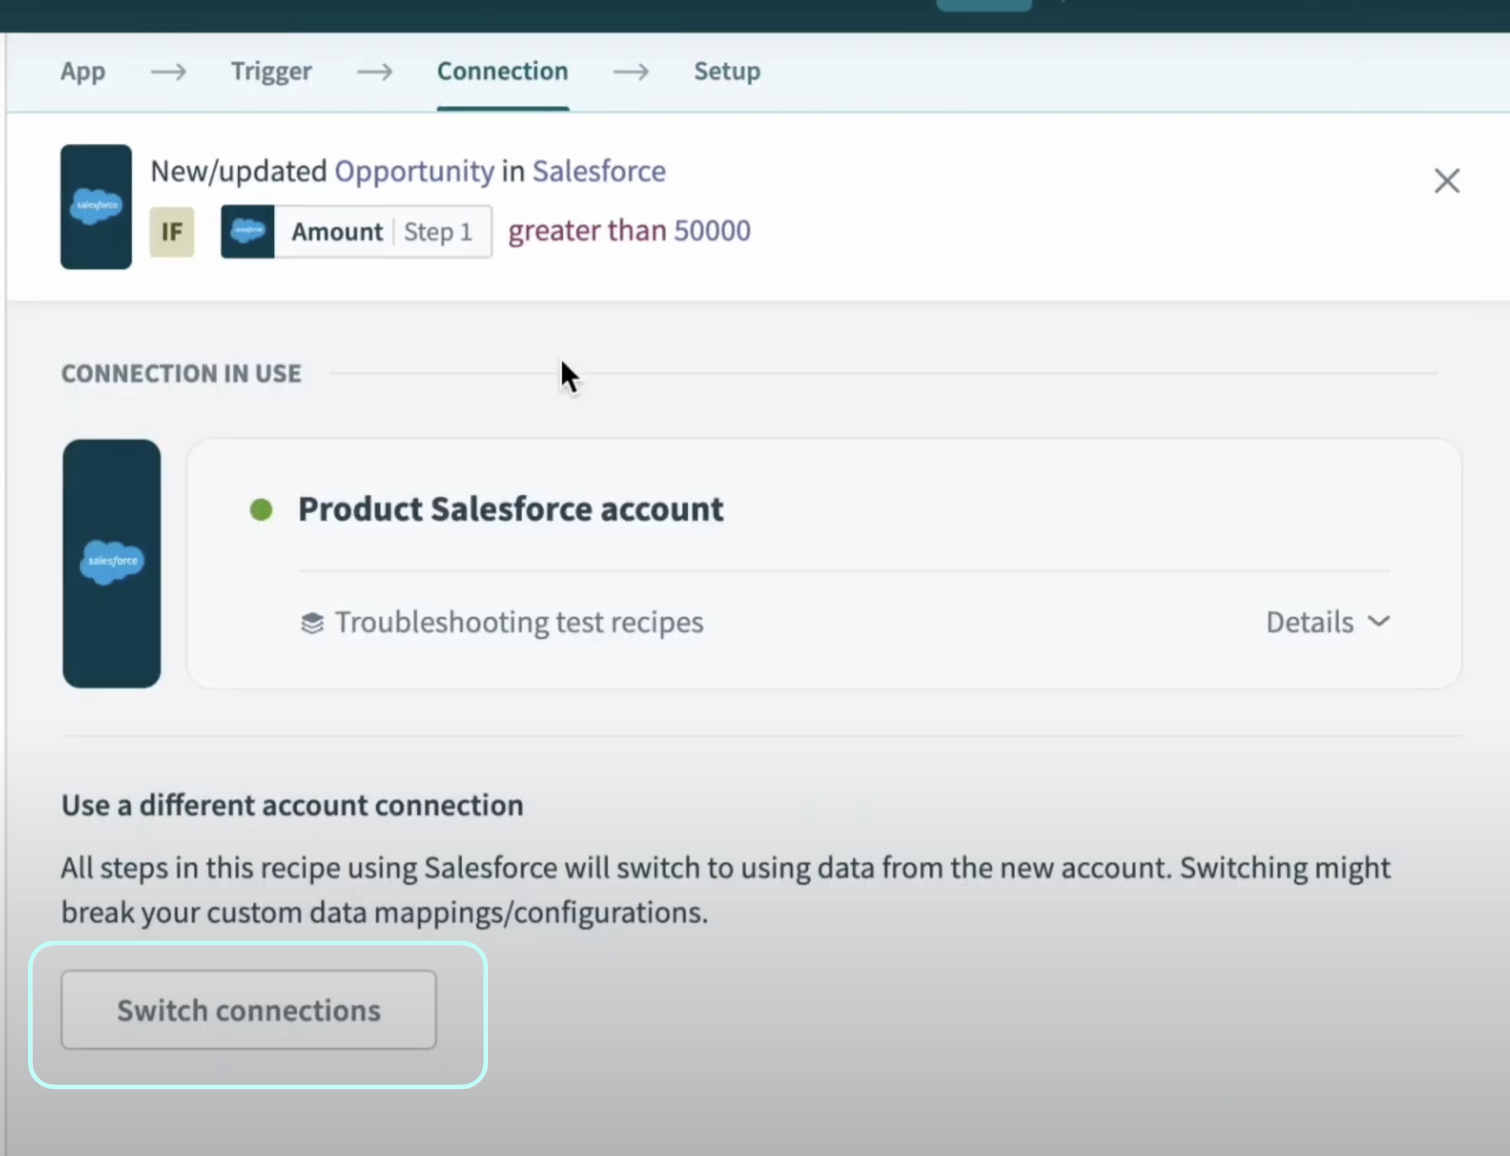
click “Switch connection” to select a new app connection
#2 Ensure you have data in your source app
In the recipe below, the recipe is triggered when there is a new or updated opportunity in Saleforce. In this case, the source app = Salesforce.
Check that the trigger you have defined is present in Saleforce – aka, there is a new or updated opportunity in Salesforce.
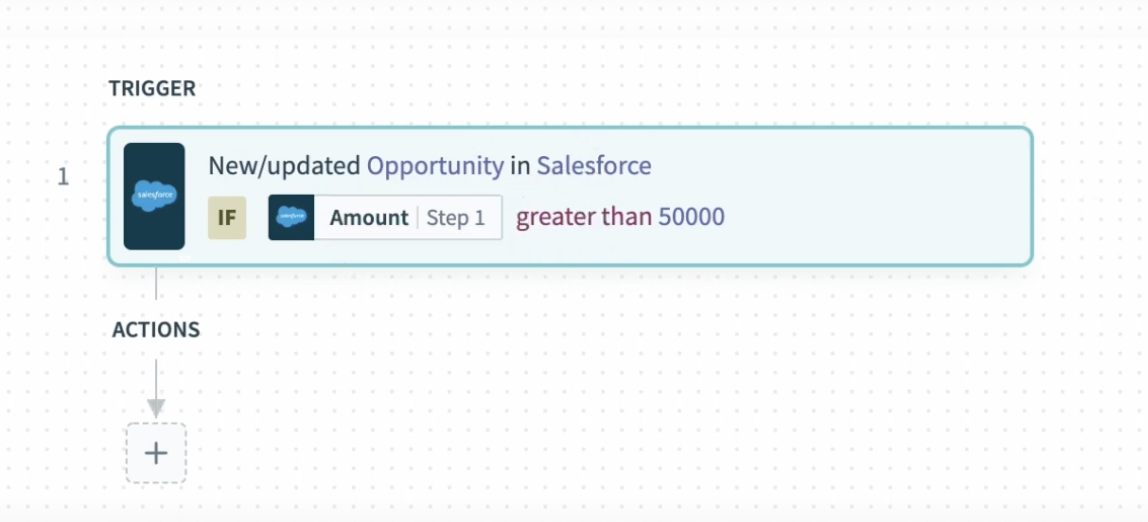
Trigger: New Salesforce opportunity
#3 Verify the trigger condition
Next, ensure that the trigger condition defined is not too precise or too loose for the data that you are looking out for.
In the example below, the recipe is only triggered for new Salesforce opportunity with an amount greater than $50,000.
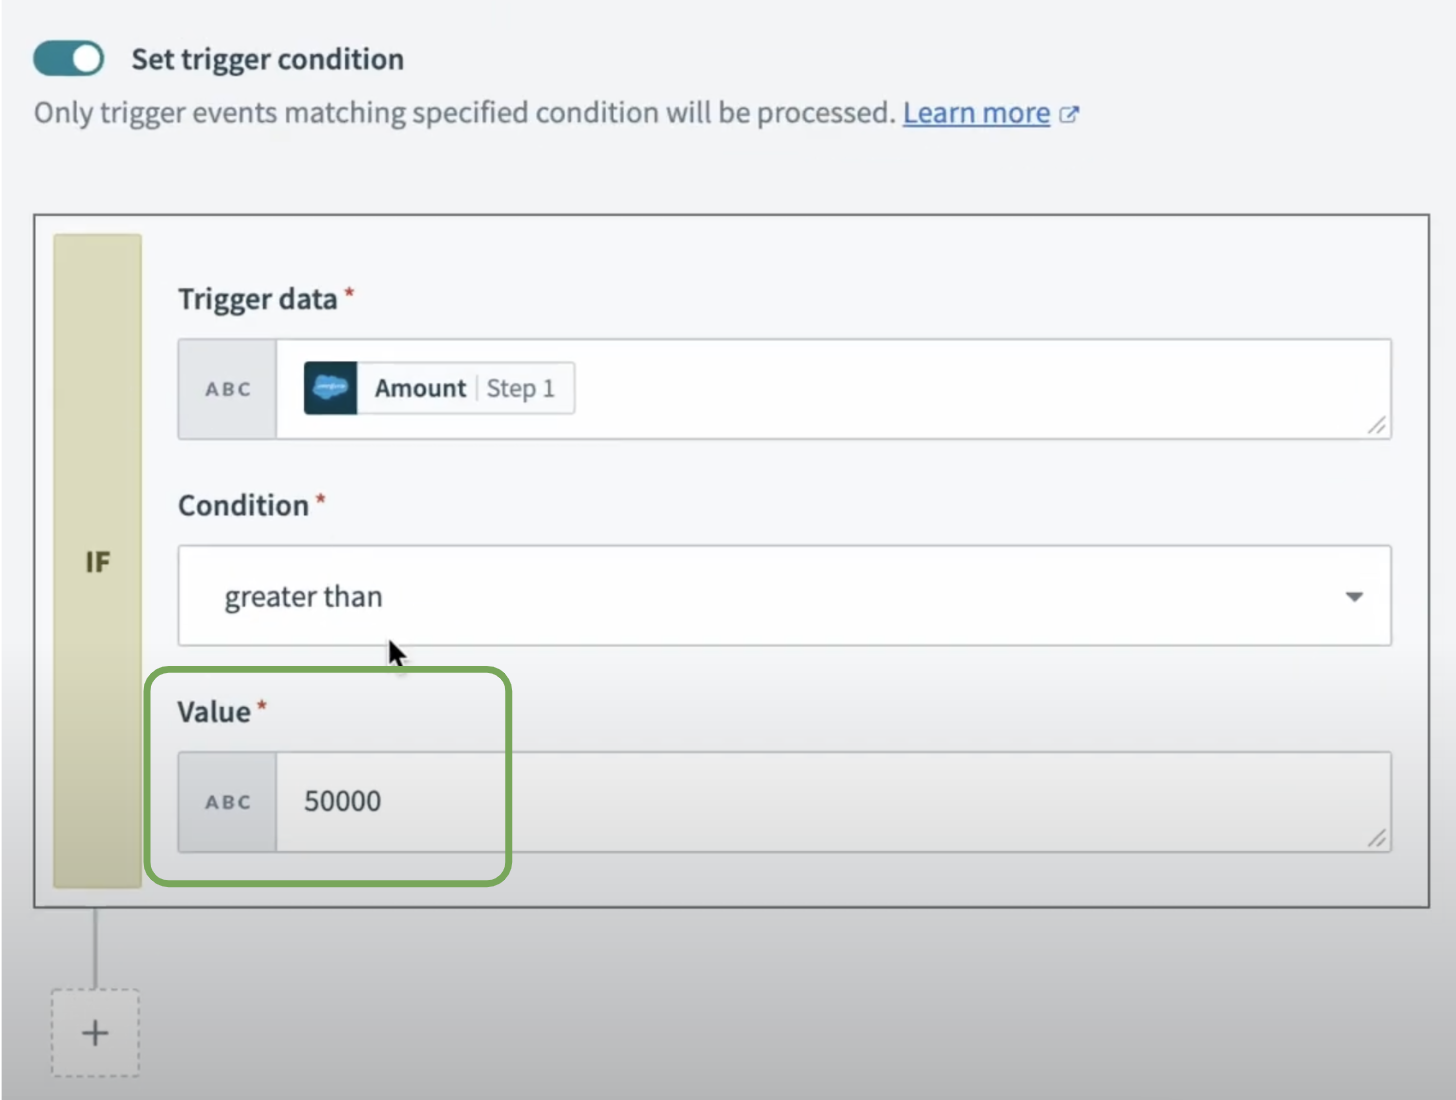
Trigger condition: case amount greater than 50,000
With this in mind, double check the data in your source app – in this case, Salesforce – to ensure that the amount present is well above the defined condition of $50,000. Below, the amount of this new Salesforce opportunity is $60,000 – it is above the $50,000 mark and the event should be triggered.
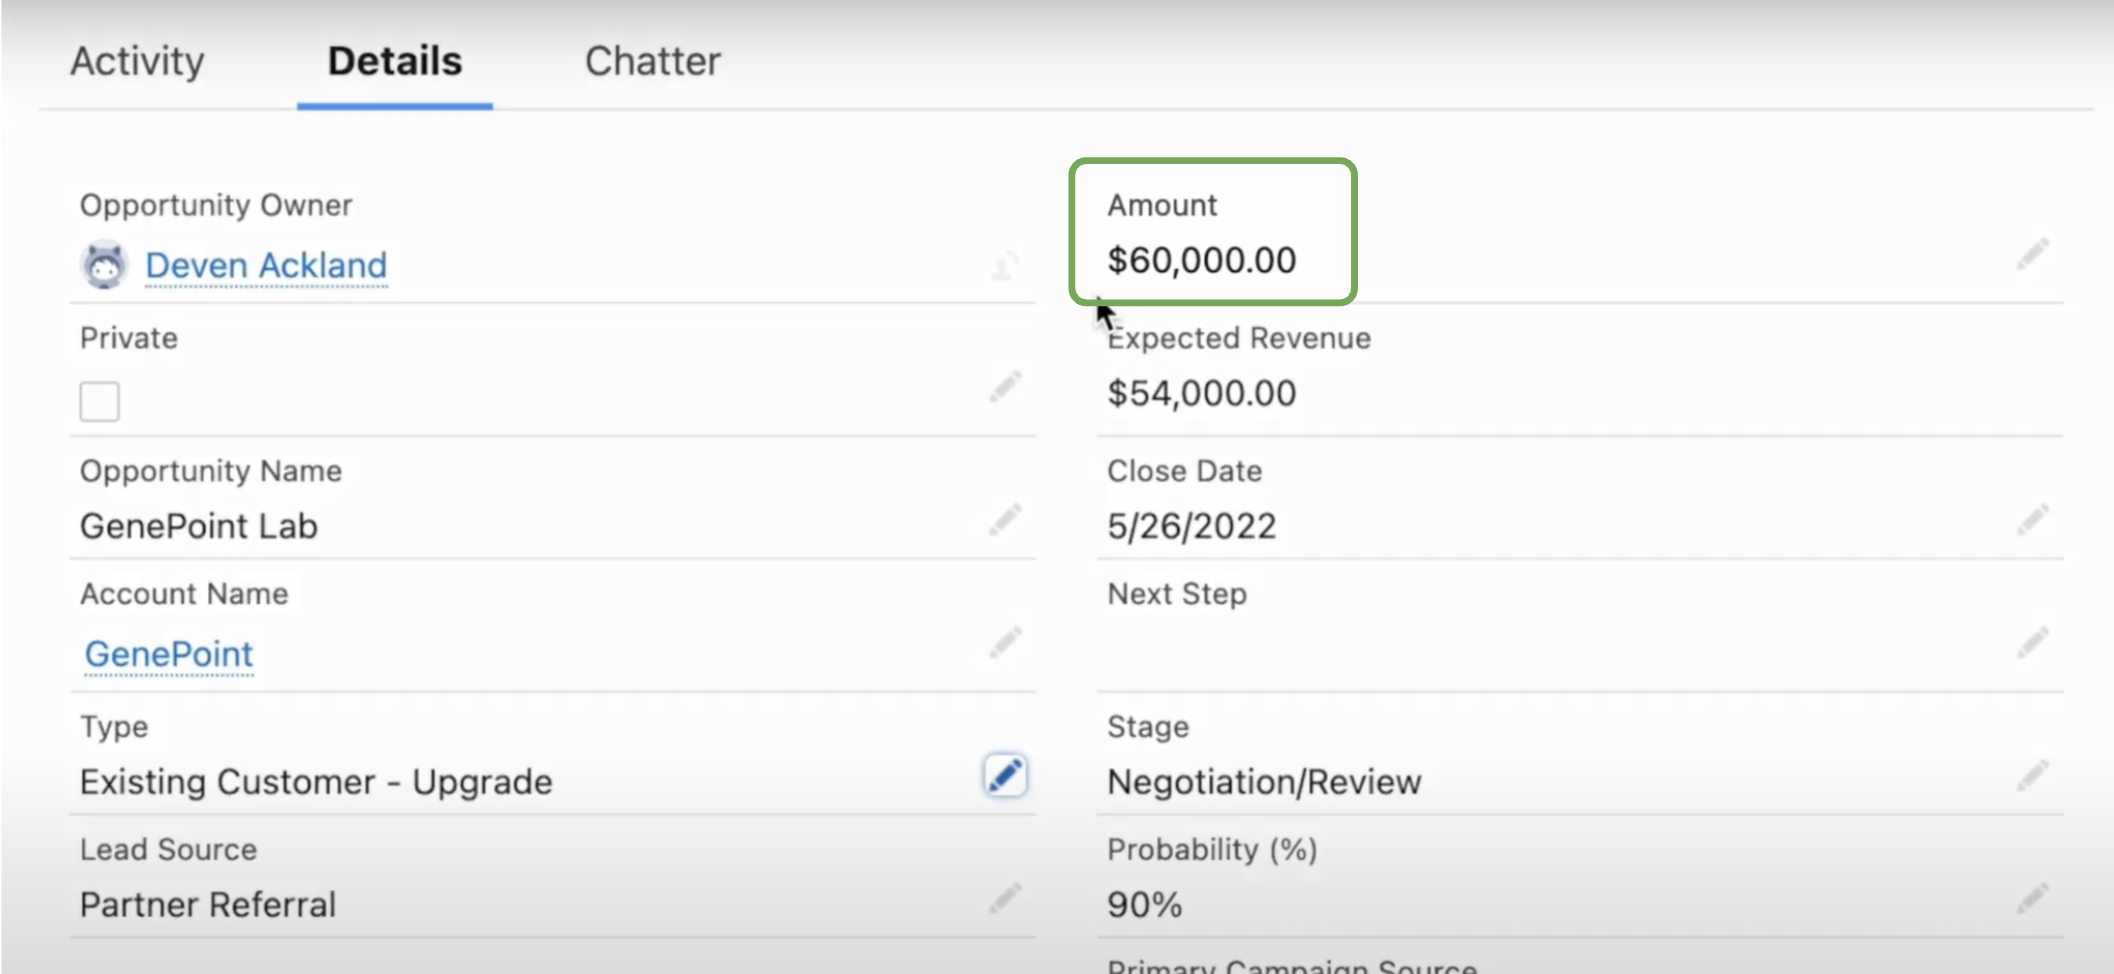
Salesforce case amount = $60,000
#4 Reset the time
If you have read till this point, you should have ensured that:
- your connection selected is correct
- your trigger data is present in your source app
- your trigger condition is verfied
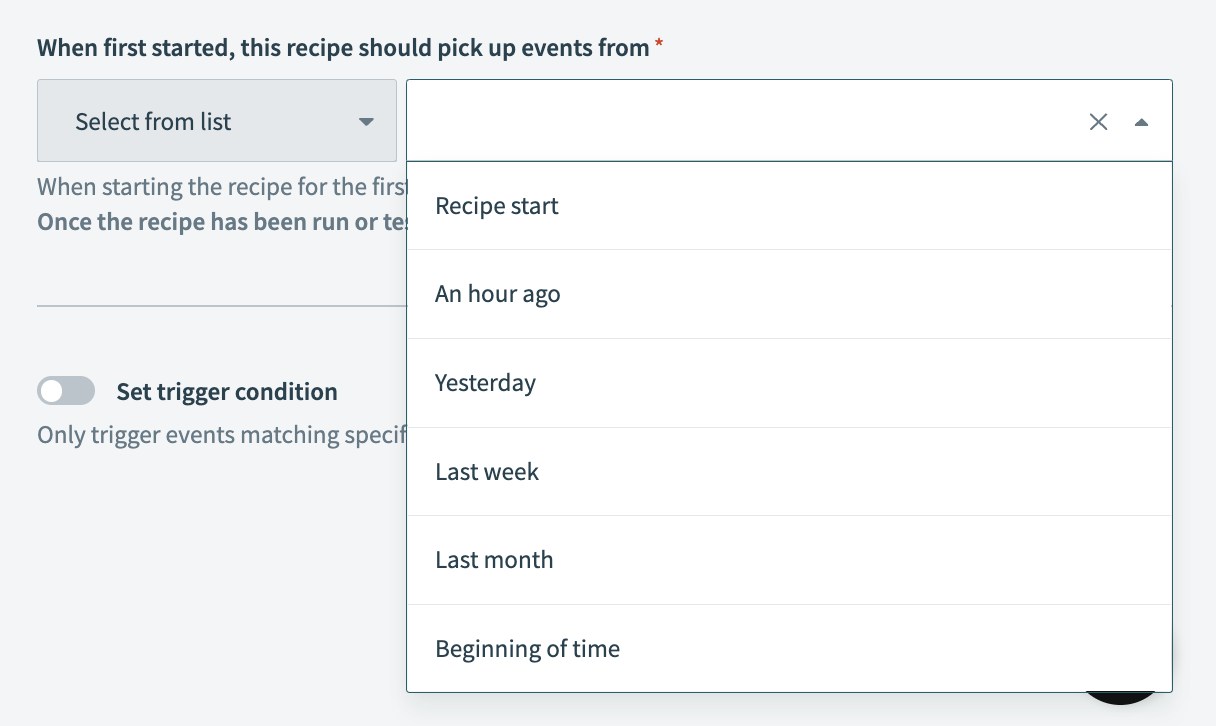
Lastly, you want to check at what point in time are you pulling your data from. With your trigger step selected, navigate to the right hand panel and look for a section with the header “When first started, this recipe should pick up events from”.
In the example below, the recipe is only picking up events from after the recipe has been started or tested. However, looking back at the example recipe, the new Salesforce opportunity was created before we started testing the recipe. Hence, the data was not pulled and no trigger was detected.
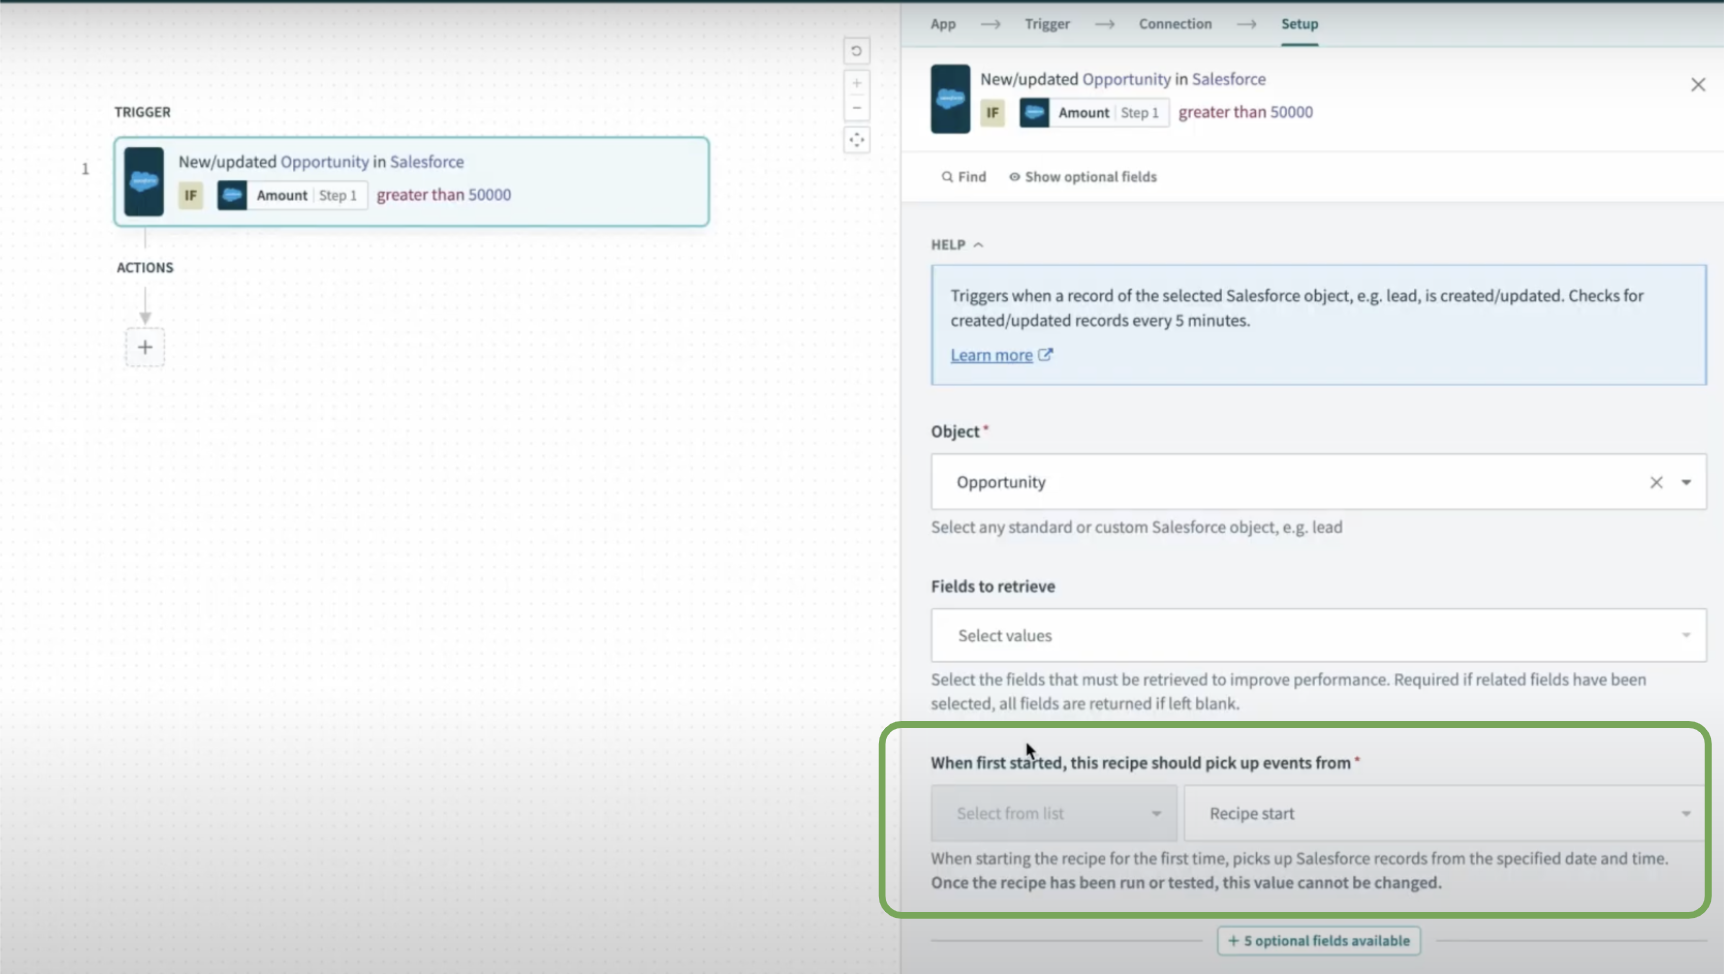
Check when the recipe is set to start
Depending on when your trigger data was created, you may define from when do you want your recipe to start picking up events. Ultimately, you want to ensure that your trigger data was created at a time that your recipe is able to detect it.
