Scheduler Trigger: Kick-off recipes to run on routine and custom schedules
The scheduler trigger is a powerful feature that enables businesses to automate processes on a schedule, saving time and streamlining operations. Whether it’s automating financial reporting, sending out email campaigns, or ingesting data into a database, the scheduler trigger provides a flexible solution for running routines and recipes at specific intervals.
In this article, we’ll walk you through how you can specify the date and time for when you want your recipe to start by using Workato’s scheduler trigger. Whether you want to run an automation every 30 minutes, or set up a custom schedule that kicks off at specific times and days, the scheduler trigger makes it easy to automate your business processes.
Related: Using wait actions with Scheduler
Using the Scheduler Trigger
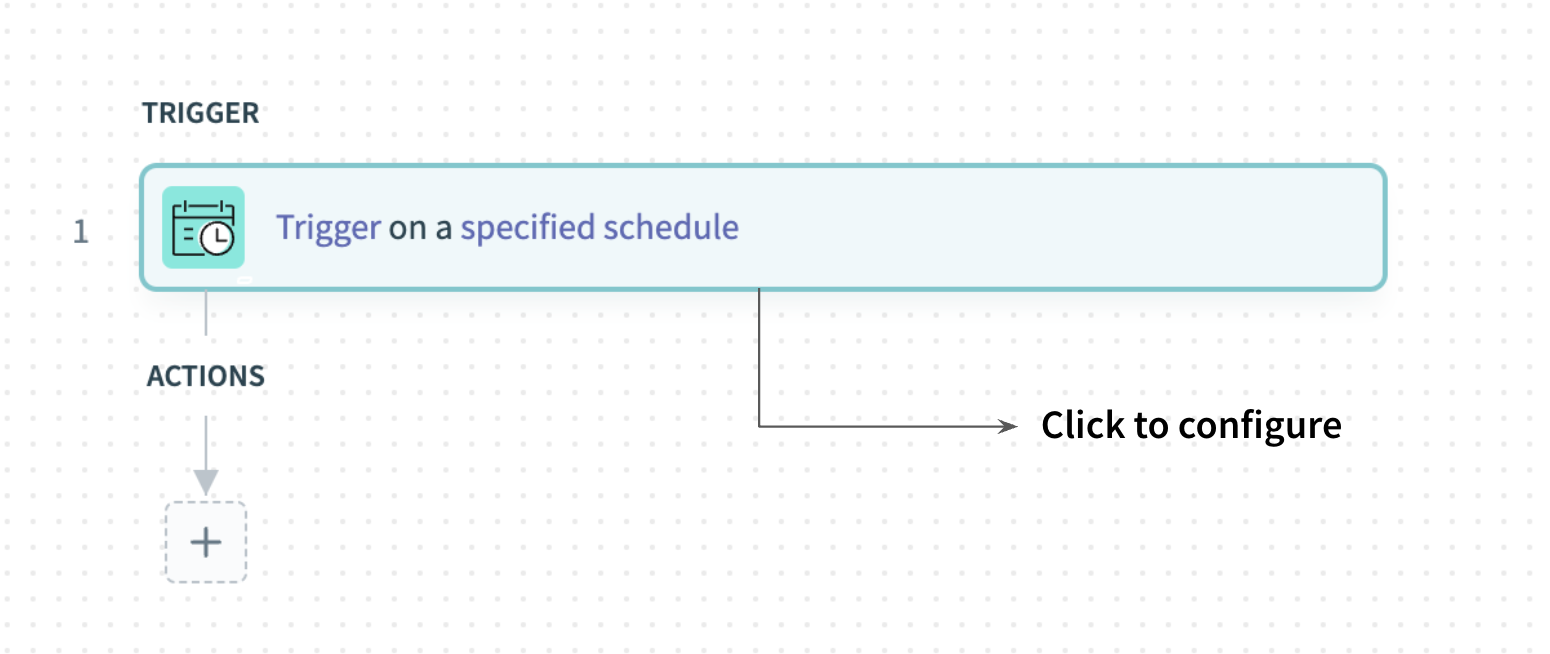
When you create a new recipe, instead of selecting Trigger from an app, select Run on a Schedule and then Start Building.
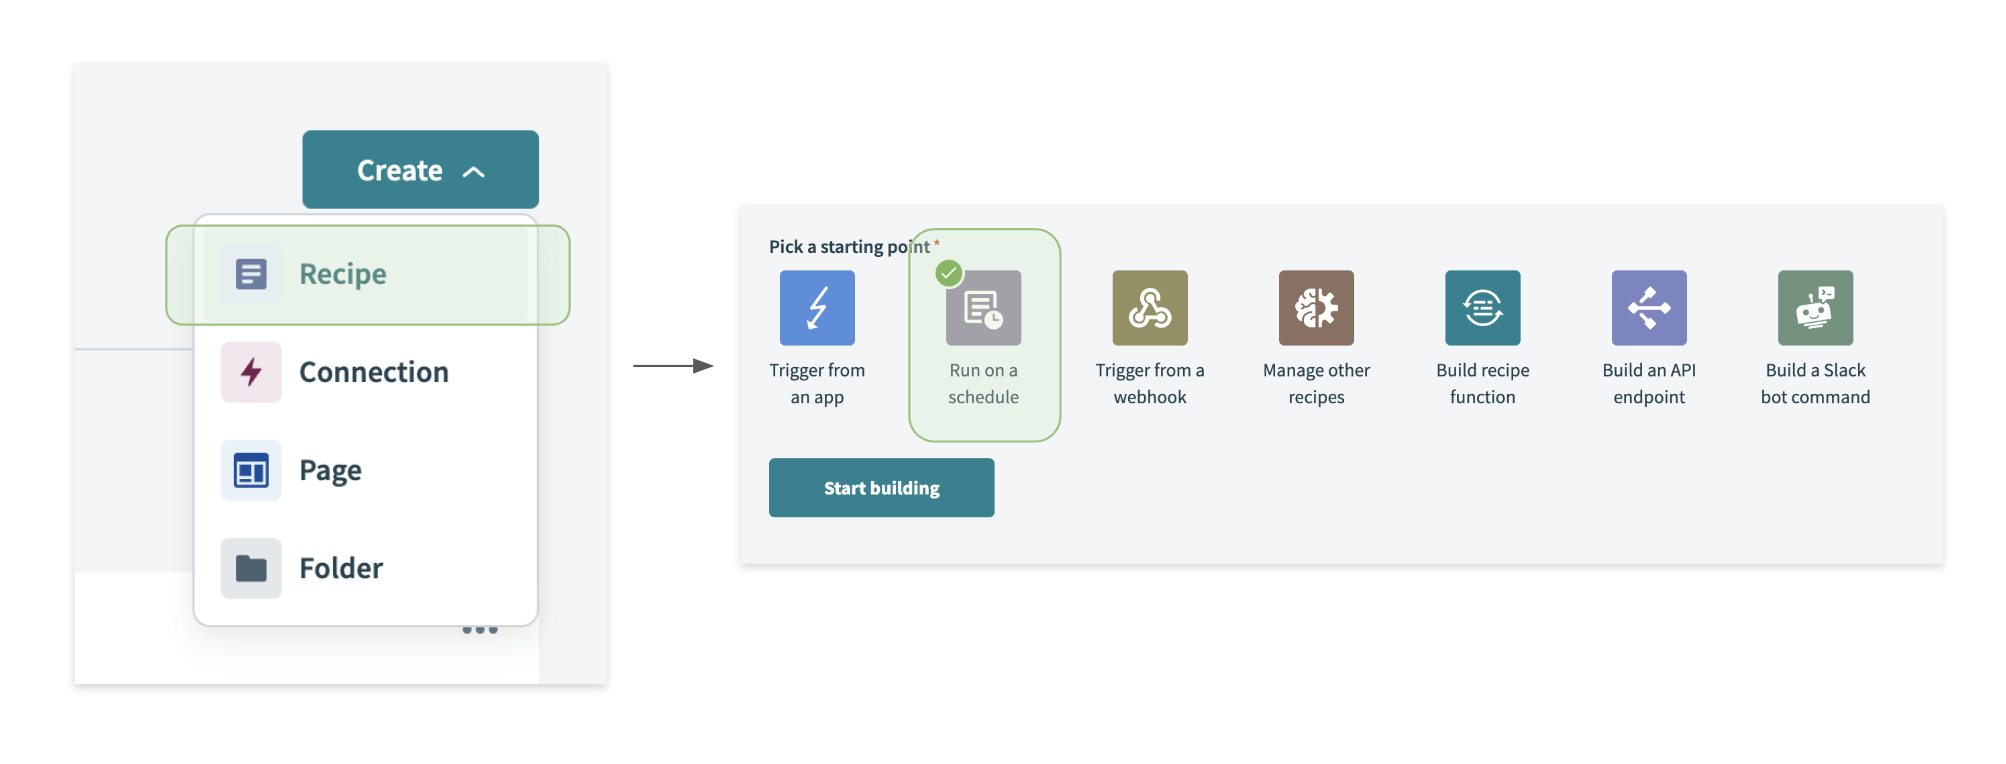
Select Scheduler trigger to kick start your recipe
From the Recipe Canvas, you can see the Scheduler Trigger step (step 1). Once you click into the scheduler trigger, you can configure it to run when you need it.
Specific Scheduling with Scheduler Trigger
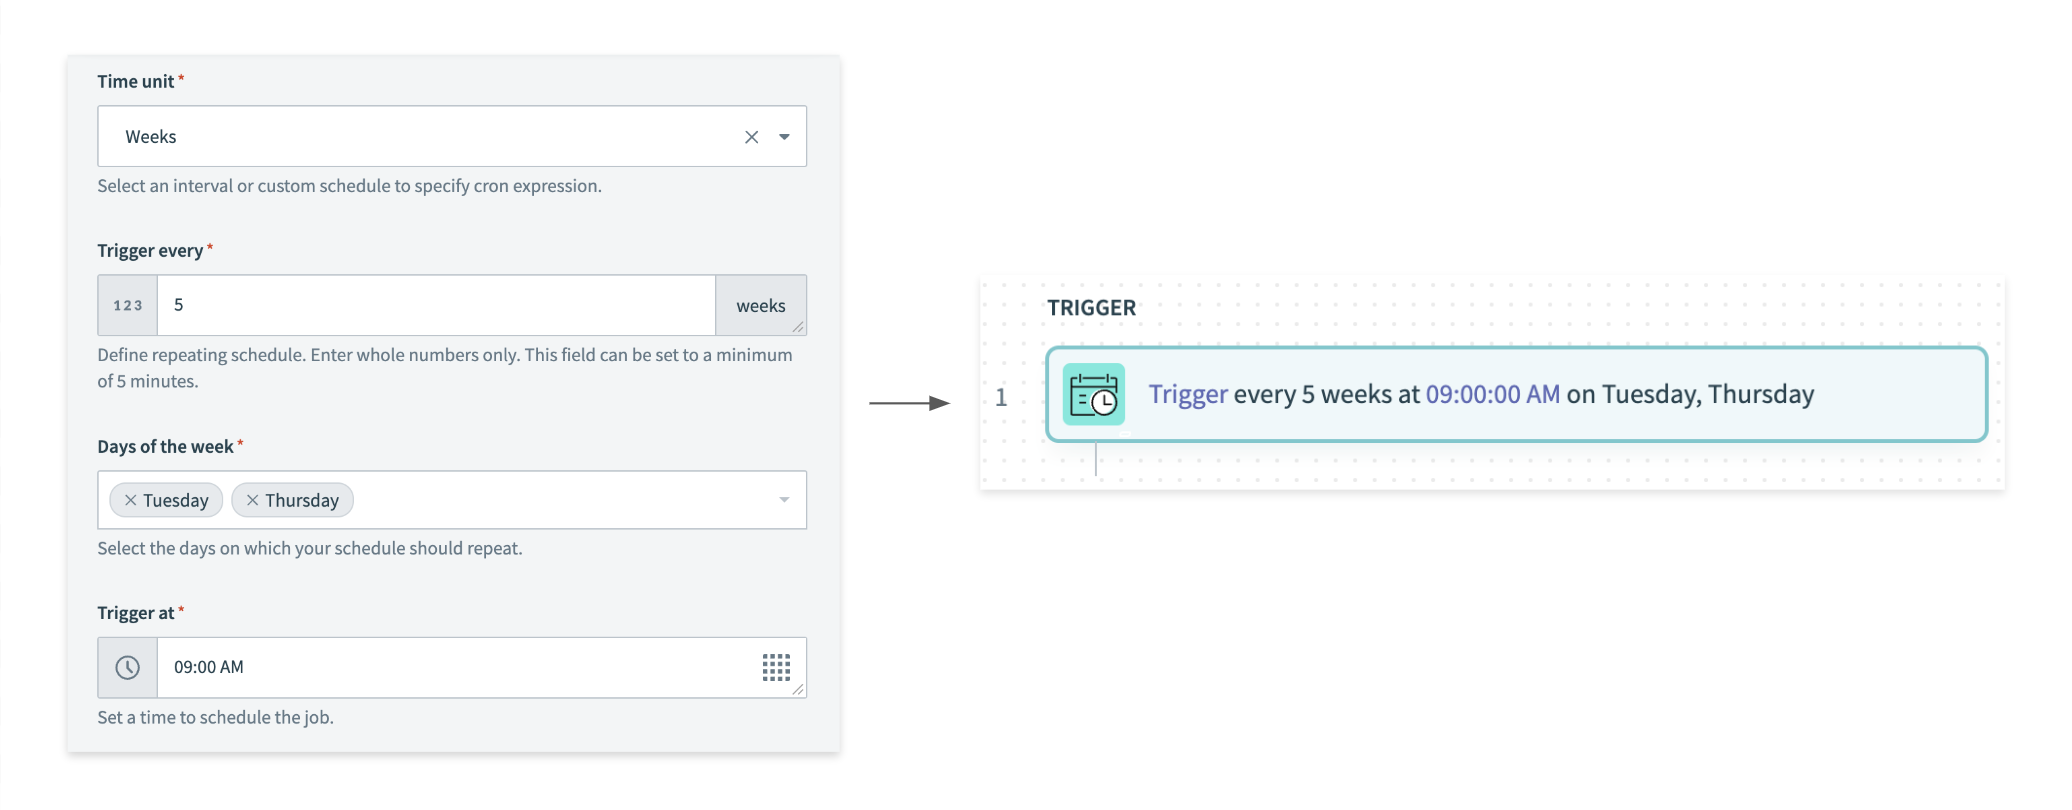
You can also set the trigger to run on a specific interval with minutes, hours, or days, and specify the interval. For instance, you can set the automation to run every 30 minutes between each job.
Similarly, you can do the same for weeks. You can select how many weeks you would like the automation to run, pick what days of the week, such as Tuesdays and Thursdays, and the time of day you want it to start. In the example below, the automation will kick off every five weeks on Tuesdays and Thursdays at 9 AM.
Custom Scheduling with Scheduler Trigger
For more specific or peculiar schedules, you can set precise schedules with Custom schedule.
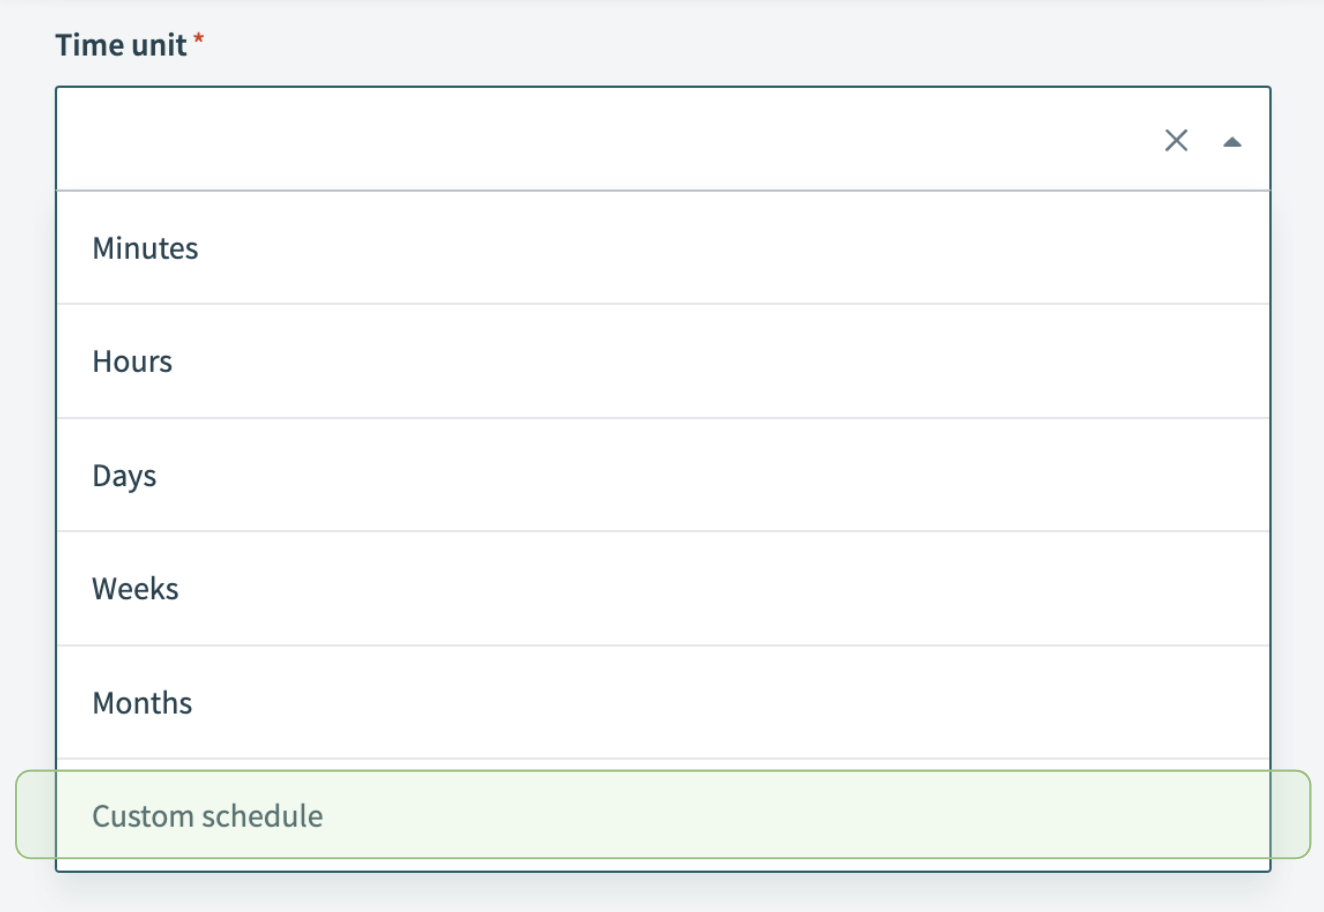
Select “Custom schedule” in the Time unit field
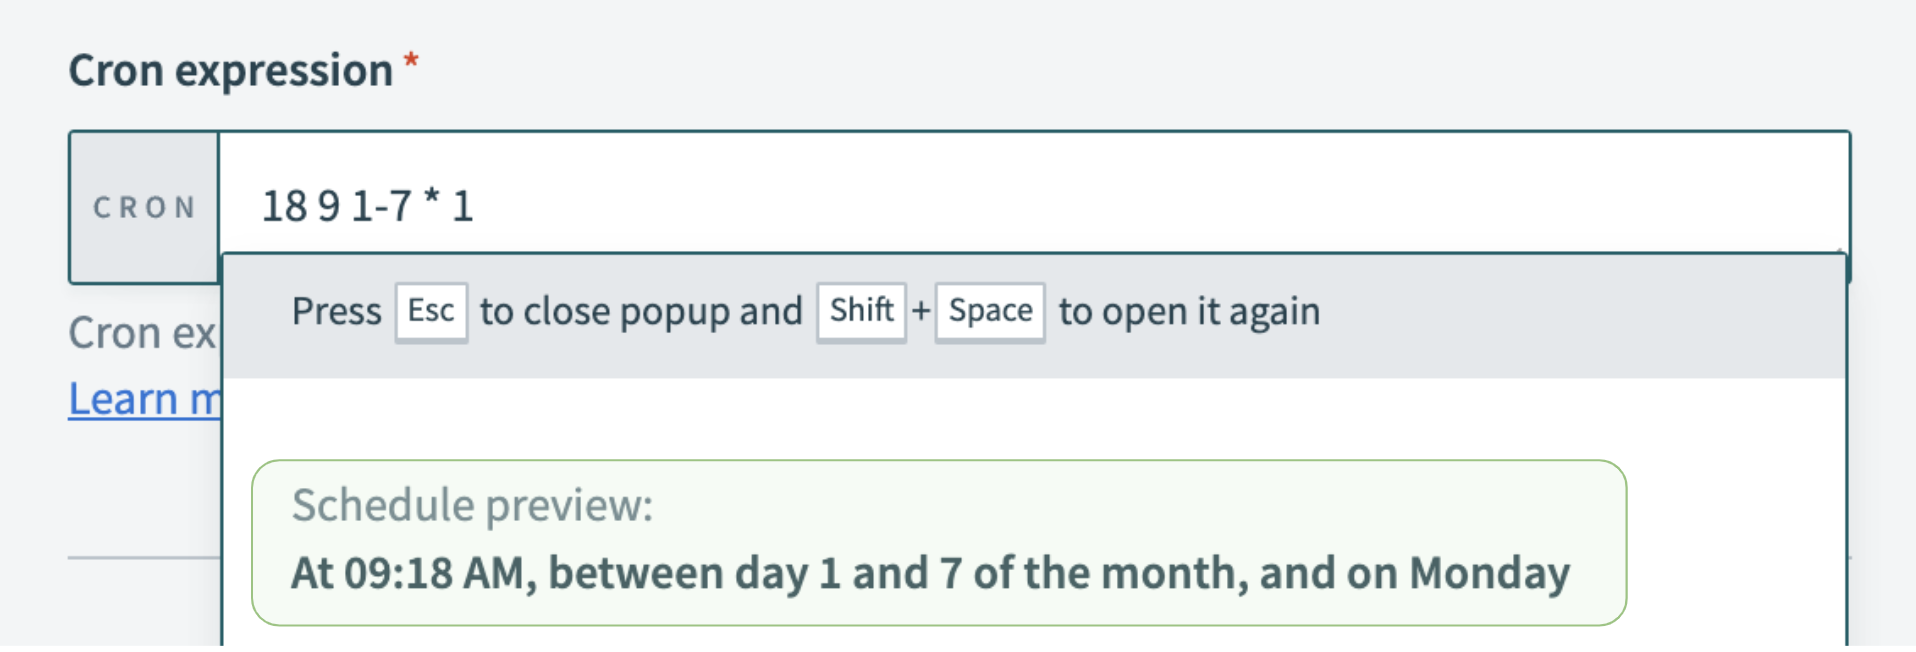
Here you will be prompted to enter a Cron expression, where each value in the expression corresponds to a specific minute, hour, day of the month, the month of the year, and the day of the week, moving from left to right.
Related: Workato docs — How to write a Cron expression
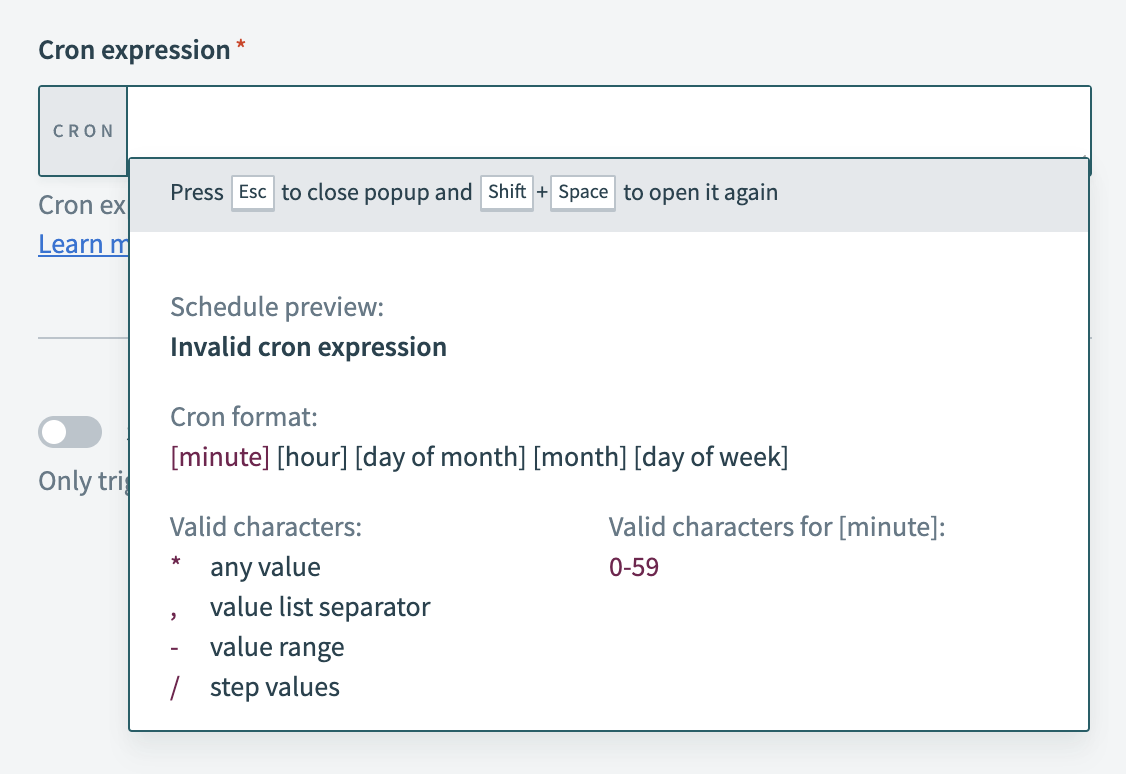
Create custom schedules with Cron expression
Example of a Custom Schedule with Cron expression
If you want the recipe to kick off at 9:18 AM on the first Monday of every month, you can enter the following values in the Cron expression:
18 9 1-7 * 1
- 18 for the minutes
- 9 for the hour
- 1–7 to specify that it’s any of the first seven days of the month
- *asterisk* to specify every single month
- 1 to specify Monday
The helper underneath the expression will show you what the Cron expression represents.
In the example below, you can see that the preview is at 9:18 AM between the first and seventh day of the month on Monday when this trigger will kick off.
Video Tutorial
If you prefer a visual tutorial, you can also watch our video tutorial below for a walkthrough of how to use the scheduler trigger in Workato.
That’s it! With Workato’s scheduler trigger, you can create and run automations on specific schedules, making it easy to streamline your business processes. For more information, you can read the full documentation on the Scheduler trigger.
